 |

|
| ActiveWin: Reviews | Active Network | New Reviews | Old Reviews | Interviews |Mailing List | Forums |
|
|
|
|
|
DirectX |
|
ActiveMac |
|
Downloads |
|
Forums |
|
Interviews |
|
News |
|
MS Games & Hardware |
|
Reviews |
|
Support Center |
|
Windows 2000 |
|
Windows Me |
|
Windows Server 2003 |
|
Windows Vista |
|
Windows XP |
|
|
|
|
|
|
|
News Centers |
|
Windows/Microsoft |
|
DVD |
|
Apple/Mac |
|
Xbox |
|
News Search |
|
|
|
|
|
|
|
ActiveXBox |
|
Xbox News |
|
Box Shots |
|
Inside The Xbox |
|
Released Titles |
|
Announced Titles |
|
Screenshots/Videos |
|
History Of The Xbox |
|
Links |
|
Forum |
|
FAQ |
|
|
|
|
|
|
|
Windows XP |
|
Introduction |
|
System Requirements |
|
Home Features |
|
Pro Features |
|
Upgrade Checklists |
|
History |
|
FAQ |
|
Links |
|
TopTechTips |
|
|
|
|
|
|
|
FAQ's |
|
Windows Vista |
|
Windows 98/98 SE |
|
Windows 2000 |
|
Windows Me |
|
Windows Server 2002 |
|
Windows "Whistler" XP |
|
Windows CE |
|
Internet Explorer 6 |
|
Internet Explorer 5 |
|
Xbox |
|
Xbox 360 |
|
DirectX |
|
DVD's |
|
|
|
|
|
|
|
TopTechTips |
|
Registry Tips |
|
Windows 95/98 |
|
Windows 2000 |
|
Internet Explorer 5 |
|
Program Tips |
|
Easter Eggs |
|
Hardware |
|
DVD |
|
|
|
|
|
|
|
ActiveDVD |
|
DVD News |
|
DVD Forum |
|
Glossary |
|
Tips |
|
Articles |
|
Reviews |
|
News Archive |
|
Links |
|
Drivers |
|
|
|
|
|
|
|
Latest Reviews |
|
Xbox/Games |
|
Fallout 3 |
|
|
|
Applications |
|
Windows Server 2008 R2 |
|
Windows 7 |
|
|
|
Hardware |
|
iPod Touch 32GB |
|
|
|
|
|
|
|
Latest Interviews |
|
Steve Ballmer |
|
Jim Allchin |
|
|
|
|
|
|
|
Site News/Info |
|
About This Site |
|
Affiliates |
|
Contact Us |
|
Default Home Page |
|
Link To Us |
|
Links |
|
News Archive |
|
Site Search |
|
Awards |
|
|
|
|
|
|
|
Credits |

Product:
Studio DV Plus
Company:
Pinnacle Systems
Website:
http://www.pinnaclesys.com/
Estimated Street Price: $285.00
Review By:
Julien Jay
Test
|
Table Of Contents |
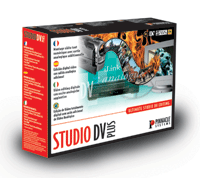
During our review we have intensively tested the Studio DV Plus solution of Pinnacle. The first thing to note is that this hardware is a quiet one! I mean the card didnít enter in conflict nor created problems with any of the other cards installed in the test system! So once you have installed the board youíll literaly forget it! We acquired a full movie of 1 hour with no problem using the Studio software. Then we started the hard job: mounting the movie! In fact this job wasnít hard at all and due to the ease of use of Studio DV Plus it was a pleasure to mount the film, cutting scenes, dragging transitions, creating titles, etc. The result of the video we mounted was a 35 minute film so as you can see thereís a lot of scrap! During this long editing session we encounter a few crashes caused by the Studio software especially when we slide scenes or added titles. Anyway with the recently released Studio 1.1 this crashes are just a bad sight for most users! To cheer up the film we added some titles using the great TitleDeko editor; the result was impressive: we easily created great looking transparent titles to comment a scene with the font of our choice. During the mounting session one thing was needed to make the film a non-bothering one: music, maestro! So we added music and due to the peak levels drawn in the edit bar of Studio when you add sounds (yeah you can add MP3!) we were able to cover original film sound by the music, or to mix the film sound with a soft music in the background, finally we were also able to add transitions between two different musics easily as well as making fade or reverse effects. Then we exported the film first on our JVC Camcorder using the DV IN mode and the film was greatly recorded but the process took a long, long time even on our powerful PC. Each scene of the film needed to be rendered, and then the software created in the background an AVI file it exported to the camcorder. To test the new analogical video output feature of the Studio DV Plus we connected a Sony VCR to it using a peritel adapter. The Studio software exported the film correctly on our VHS tape, but before you launch the record donít forget you have to put the VCR in record mode and select the ĎLí input method since Studio canít do it automatically like it does for DV camcorders. The VHS tape produced was a good quality one and there was only a few quality loss comparing to the DV original. Finally as itís out of topic to use the Studio DV Plus board with Adobe Premiere 5.1, everyone will be glad to know that the brand new Premiere 6.0 works great with it!!
| <-- Features |
